Suspension Talk
A simple guide to mountain bike rear suspension
TECH TALK
1/9/20264 min read

A simple guide to Mountain Bike Rear Suspension
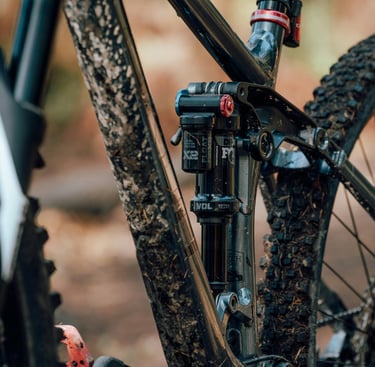
Modern full-suspension mountain bikes use a variety of rear suspension platforms. While many look similar at a glance, the kinematics behind them differ significantly. Each system represents engineering trade-offs between pedaling efficiency, braking performance, bump absorption, weight, and maintenance.
Below are the main mainstream suspension types, along with their pros, cons, and a real-world example of each design.
1. Single Pivot
What It Is
A single pivot suspension uses one main pivot point located above and forward of the bottom bracket. The rear axle follows a simple arc around that pivot.
Best for: Riders who value durability and simplicity.
A single pivot uses one primary rotation point. It’s the most mechanically straightforward design, but braking forces can stiffen the suspension under heavy rear brake input.
Example
Orange Bikes – Orange Five
https://www.orangebikes.com/bikes/five
Pros
Mechanically simple
Durable and robust
Lower maintenance
Predictable suspension feel
Cons
Braking can stiffen suspension (brake jack)
Less independent control of pedaling forces
Limited axle path tuning
Ideal For
Riders who prioritize durability and simplicity over kinematic complexity.
2. Horst Link (Four-Bar with Chainstay Pivot)
What It Is
A four-bar linkage system with a pivot on the chainstay, just in front of the rear axle. This pivot helps isolate braking forces from suspension movement.
Best for: Trail and enduro riders wanting balanced performance.
By placing a pivot on the chainstay near the rear axle, braking forces are more isolated from suspension movement, improving traction on descents.
Example
Specialized – Stumpjumper
https://www.specialized.com/us/en/stumpjumper
Pros
Active suspension under braking
Highly tunable leverage curve
Balanced pedaling performance
Versatile design
Cons
More pivots = more bearings
Slightly heavier than single pivot
Ideal For
Trail and enduro riders wanting balanced all-around performance.
3. Linkage-Driven Single Pivot
What It Is
A single main pivot, but the shock is driven via linkages to allow better leverage curve tuning.
Best for: Riders who want simple axle behavior but modern shock progression.
The linkage allows engineers to tune the leverage curve while keeping the classic single pivot axle path.
Example
Transition Bikes – Sentinel
https://transitionbikes.com/Bikes_Sentinel.cfm
Pros
Simple axle path
Modern progressive shock curve
Good stiffness
Cons
Brake jack still present
Added linkage complexity
Ideal For
Riders who want simple suspension feel with modern shock performance.
4. DW-Link
What It Is
A dual short-link system developed by Dave Weagle, using counter-rotating links to control anti-squat and axle path.
Developed by Dave Weagle.
Best for: Technical climbers and aggressive trail riders.
Known for high anti-squat values, this design resists pedal bob while remaining active over bumps.
Example
Ibis Cycles – Ripmo
https://www.ibiscycles.com/bikes/ripmo
Pros
Excellent pedaling efficiency
Minimal pedal bob
Efficient climbing
Active braking performance
Cons
More complex
More bearings to maintain
Ideal For
Technical trail and enduro riders who value climbing performance.
5. VPP (Virtual Pivot Point)
What It Is
A dual-link system where the virtual pivot point moves throughout the suspension travel.
Developed by Santa Cruz Bicycles and Intense Cycles.
Best for: Aggressive trail and enduro use.
The virtual pivot changes location throughout travel, allowing engineers to fine-tune pedaling efficiency and mid-stroke support.
Example
Santa Cruz Bronson
https://www.santacruzbicycles.com/en-US/bikes/bronson
Pros
Strong pedaling platform
Good mid-stroke support
Highly tunable leverage curves
Cons
Bearing maintenance
Can feel firm if not tuned properly
Ideal For
Aggressive trail and enduro riding.
6. Maestro
What It Is
A dual-link suspension system developed by Giant Bicycles.
Best for: Versatile trail and XC riders.
Giant’s floating pivot layout balances pedaling efficiency with bump sensitivity.
Example
Giant Trance X
https://www.giant-bicycles.com/global/trance-x-advanced-pro-29-2024
Pros
Smooth small bump compliance
Efficient under pedaling
Balanced all-around ride feel
Cons
Multiple pivots to service
Brand-exclusive platform
Ideal For
Trail and XC riders wanting versatility.
7. ABP (Active Braking Pivot)
What It Is
A system where the rear pivot is concentric with the rear axle to maintain suspension activity while braking.
Developed by Trek Bicycle Corporation.
Best for: Riders descending steep terrain where braking control is critical.
By placing the pivot concentric with the axle, braking has less effect on suspension movement.
Example
Trek Slash
https://www.trekbikes.com/us/en_US/bikes/mountain-bikes/trail-mountain-bikes/slash/c/B581/
Pros
Active under braking
Stable descending feel
Improved traction
Cons
Added complexity
Slight weight increase
Ideal For
Enduro and downhill riders prioritizing braking control.
8. Split Pivot
What It Is
Designed by Dave Weagle, using a concentric dropout pivot to isolate braking forces.
Also designed by Dave Weagle.
Best for: Hard-charging enduro riders.
Offers braking neutrality similar to Horst Link with refined anti-squat characteristics.
Example
Devinci Cycles – Spartan
https://www.devinci.com/en/bikes/mountain/spartan/
Pros
Excellent braking neutrality
Strong pedaling characteristics
Durable under aggressive riding
Cons
More bearings
Licensing complexity
Ideal For
Hard-charging trail and enduro riders.
9. High Pivot
What It Is
A single pivot placed higher on the frame, often paired with an idler pulley to manage chain growth and pedal kickback.
Best for: Downhill and bike park riders.
A rearward axle path helps the wheel move backward over square-edge hits, improving high-speed stability and traction.
Example
Forbidden Bike Co – Dreadnought
https://forbiddenbike.com/bikes/dreadnought/
Pros
Rearward axle path
Excellent square-edge bump absorption
Extremely stable at speed
Cons
Added drivetrain drag
Increased weight
More maintenance
Ideal For
Downhill, bike park, and aggressive enduro riding.
10. Flex Stay (Pivotless)
What It Is
Uses engineered flex in the seatstays instead of a pivot near the rear axle.
Best for: XC racing and weight-conscious builds.
Instead of a physical pivot near the axle, the seatstays flex within engineered limits to allow travel while reducing bearings and weight.
Example
Cannondale – Scalpel
https://www.cannondale.com/en/bikes/mountain/cross-country/scalpel
Pros
Fewer bearings
Lighter weight
Reduced maintenance
Clean design
Cons
Limited travel range
Material fatigue considerations
Ideal For
XC riders prioritizing efficiency and low weight.
Final Thoughts
Every rear suspension system represents a compromise between:
Anti-squat (pedaling efficiency)
Anti-rise (braking neutrality)
Axle path
Leverage progression
Weight
Maintenance
Modern designs are extremely refined, and for most riders, geometry, shock tuning, and setup matter just as much if not more than the suspension type alone.
Modern full-suspension mountain bikes use a variety of rear suspension systems. While many look similar, their kinematics differ significantly.
Which Suspension Design Is Best?
There is no universally “best” system. The ideal choice depends on:
Riding style
Terrain
Maintenance tolerance
Weight priorities
Climbing vs descending focus
For most riders, modern geometry, shock tuning, and setup will influence ride feel just as much as suspension design.